5 Ways to Create Folders in Windows
When reading the title of this article, you probably wondered if there are more than 2 ways to create a folder in Windows, and yes, we guarantee that there are. If this topic has triggered your curiosity, follow the article until the end as we are going to teach you 5 ways to create folders in Windows.
Why create folders in Windows?
Folders are key organizational resources. Through them, we can segment documents, photos, videos and files according to the theme or according to the criteria we want. But, in addition to bringing practicality to day-to-day life, folders play a very important role in optimizing Windows.
By organizing files into folders, it is possible to improve the division of hard disk structures with a resource that takes up almost no space on the HD.
With each Windows update, new ways to use this feature are created and, therefore, we will show you the 5 best ways to create folders in Windows. Surely, one of these ways will add some new knowledge to enhance your organization.
Ways to Create Folders in Windows
The most common ways are the right mouse button or File Explorer, however, it is also possible to create folders using a keyboard shortcut, Command Prompt or Windows Power Shell. Check the step by step below.
1- Creating folders by right mouse button
This is one of the best known and most practical ways. You just need to access the area where you want to create the folder, then click on the right mouse button and select the “New” option. Finally, select the “Folder” option and that’s it.
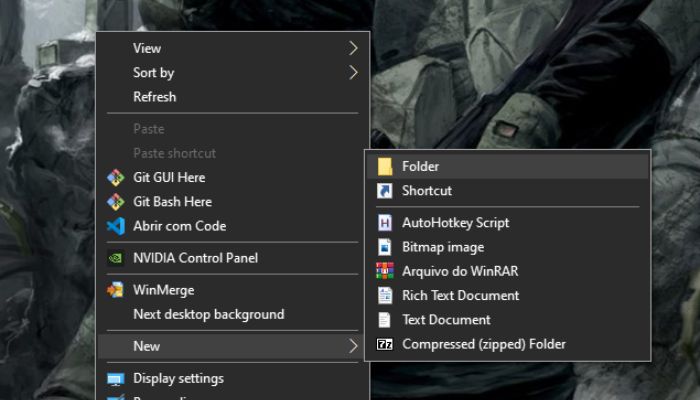
Then you can edit the folder name with your desired name.
2- Creating folders by keyboard shortcut
This form manages to be even more practical than the previous one. Just access the area where you want to create the folder and press the CTRL + SHIFT + N keys simultaneously. After carrying out this step, your folder will be created and you will only need to rename it and import the desired files.
3- Using the toolbar to create folders in Windows
This option is also quite practical. At the top of your access areas (“Documents”, “Downloads”, “Images”, “Music”…) there is a Toolbar. In this bar, there are some options and one of them is the creation of new folders. To do so, click on “New” in the upper left corner of the screen, and select the “Folder” option.
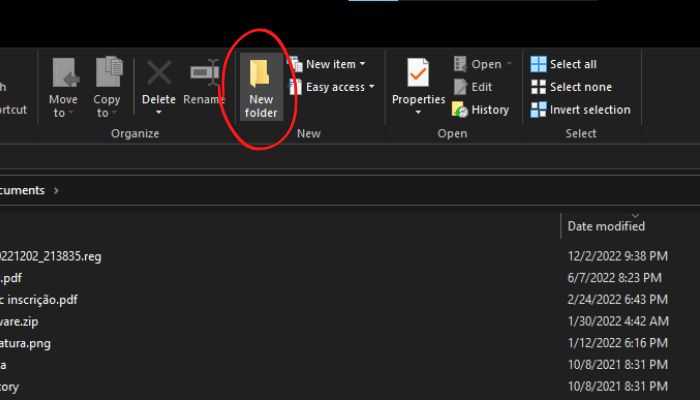
4 – Creating folders by Command Prompt
Command Prompt (CMD) equates the text-based interface with the graphical interface. The purpose of the program is to perform both simple tasks and advanced administrative functions.
The system design leads us to believe that this is the most difficult way to create the folder, but this step by step will simplify everything.
First, search for Command Prompt in the Windows search bar and open the program.
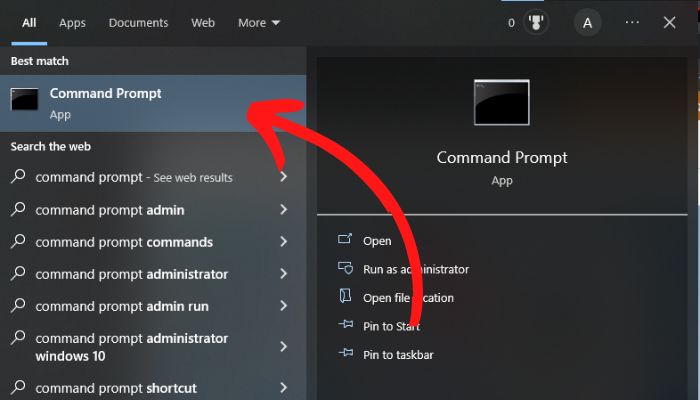
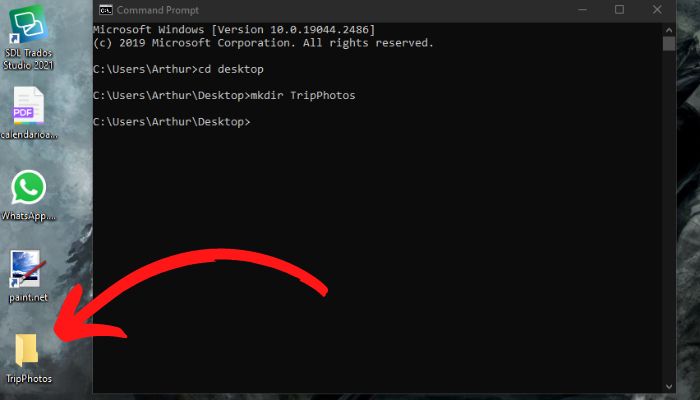
Once the program is open, type the command “cd + Space + name of the area where you want to create the folder”. For example: “cd desktop” to create the folder on the Desktop. Finally, press Enter.
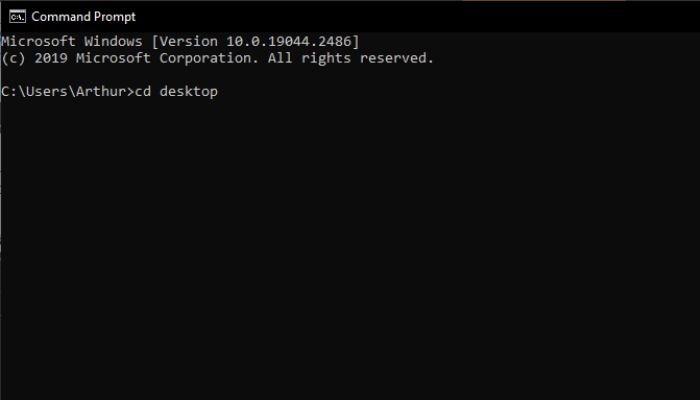
Once you have defined the area where the folder will be created, type the following command to name it: “mkdir + Space + FolderName”. Example: “mkdir TripPhotos”. In this step, it is important to remember not to include spaces between words in the folder name.
More options with Command Prompt
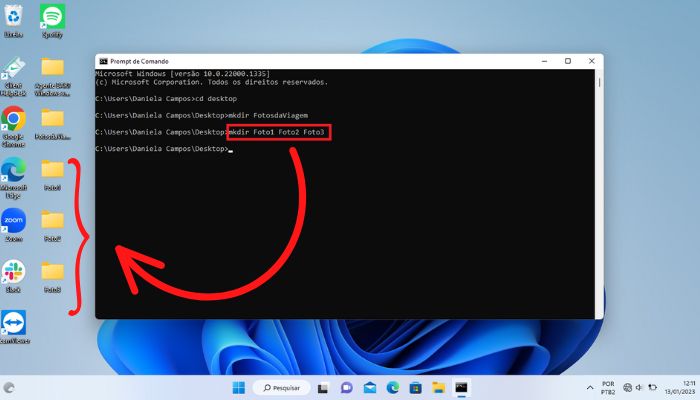
A very interesting function in creating folders with the Command Prompt is the possibility of creating more than one folder simultaneously. To do this, simply include a space between the name of each folder as in this example: “mkdir + Space > Folder1 + Space + Folder2…
After adding the desired folders, just press ENTER and they will be created in the chosen area.
5 – Creating a folder using Windows PowerShell
PowerShell is a Windows automation program. Through it, it is possible to automate system management, among other advanced functions. Therefore, it’s perfect for anyone who has a large volume of files to organize and needs to create several folders simultaneously.
With just two commands, Windows PowerShell lets you create new folders within an existing folder. This function brings a lot of agility for those who need to use the function on a large scale.
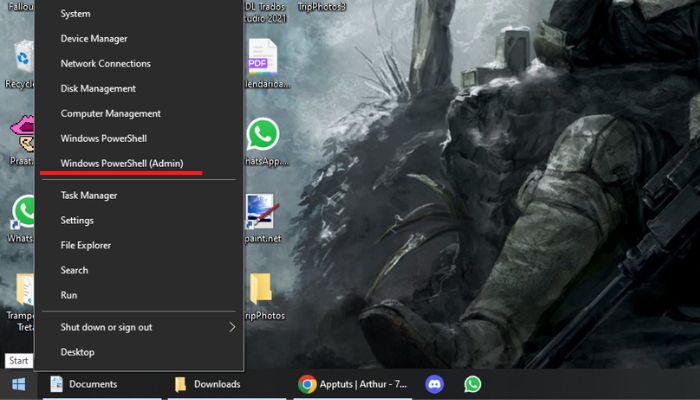
To get started, search for Windows PowerShell Admin in the search bar or use the shortcut Winkey (Windows Logo + X). Then open the program.
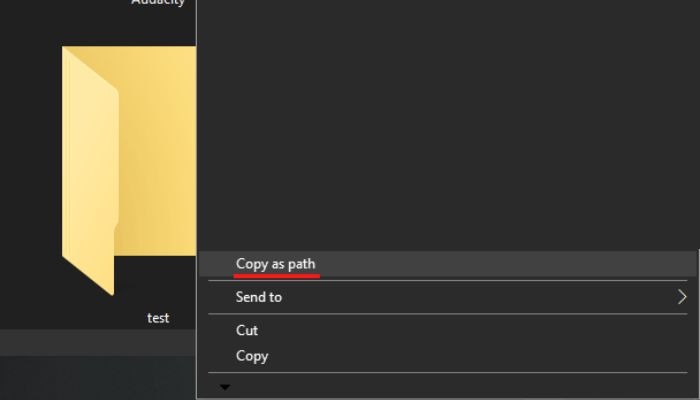
Next, search for the desired folder, right-click on it and select the “Copy as path” option. You will need to add this path to the command for the program to access the folder.
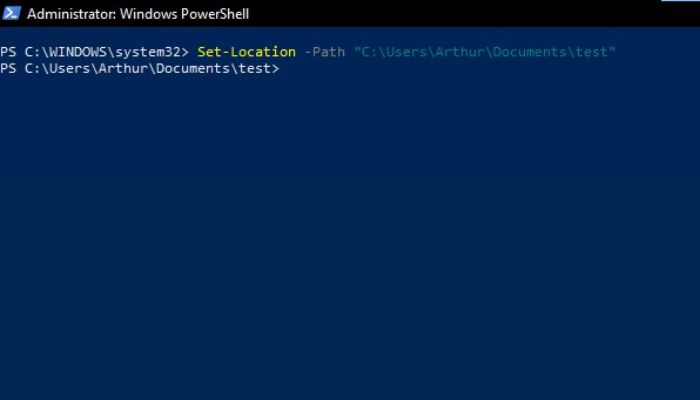
With the folder path copied, enter the following command in PowerShell: Set-Location -Path “Path copied” (Example: Set-Location -Path “C:\Users\Arthur\Documents\test”). In this step, it is important for the user to make sure that the copied path is enclosed in quotation marks so that the program can recognize it. Then just press “Enter” and go to the last step.
In the last step, you will define the number of folders you want and the name that will be given to them. To do so, just type the following command: mkdir $(1..3 | %{“Test $_”})
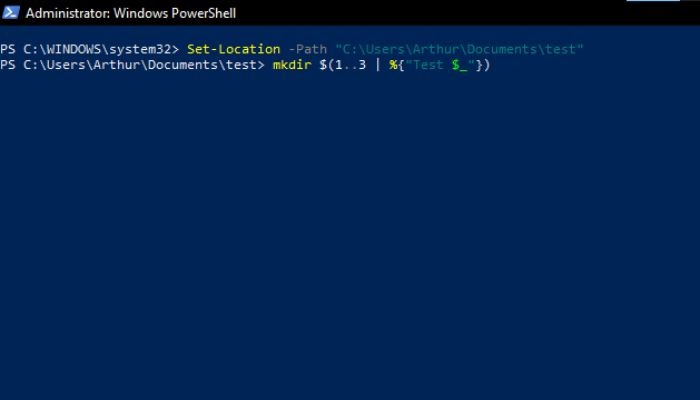
Note that the numbers that appear after the “$(” elements correspond to the number of folders, and the word that appears after the “%{” elements corresponds to the folder name. You must edit the command to include the number of folders you want create and the name they will receive.
Tips for optimizing folder creation with PowerShell
As this program demands the use of very specific shortcuts, the ideal is to leave the commands already edited in a notepad, and then just copy them in PowerShell.
It’s also important to point out that these commands don’t create folders with different names like Command Prompt does. In this case, all folders created with automation will have the same name, but you can rename them at any time.
Did you like to learn the 5 ways to create folders in Windows?
So, now it’s just a matter of choosing the way that best suits your goals and starting your organization. No excuses to leave those stray files on the desktop, huh? Oh, and take the opportunity to share the article with friends and keep following the blog for more tips.


